Disclosure: Joyfully Domestic may earn a commission for purchases made after clicking links on this page. View our disclosure policy for details.
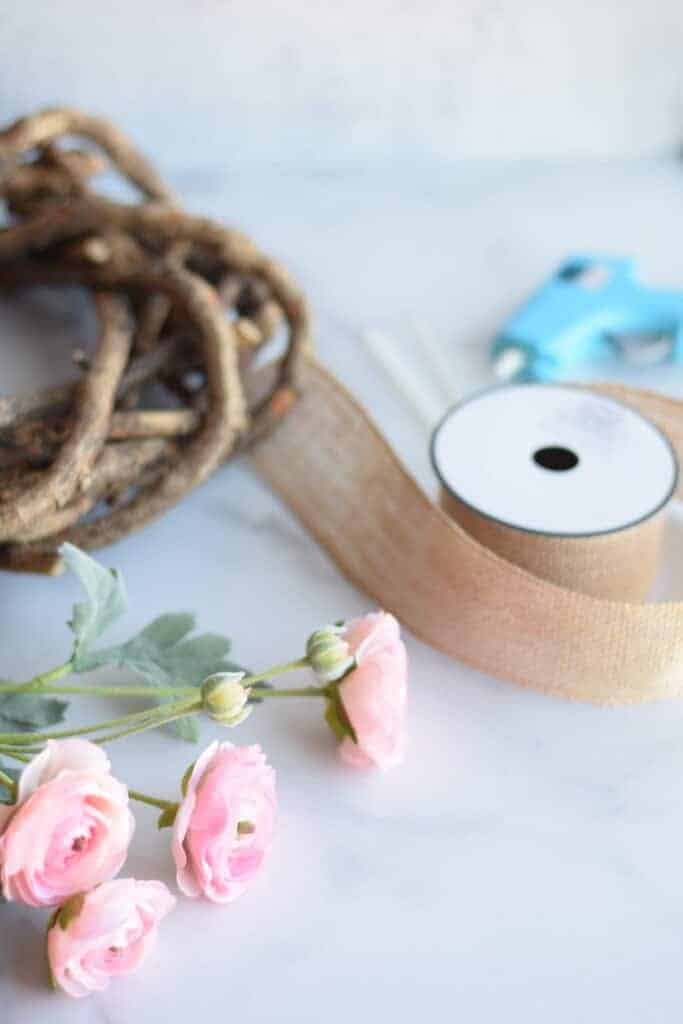
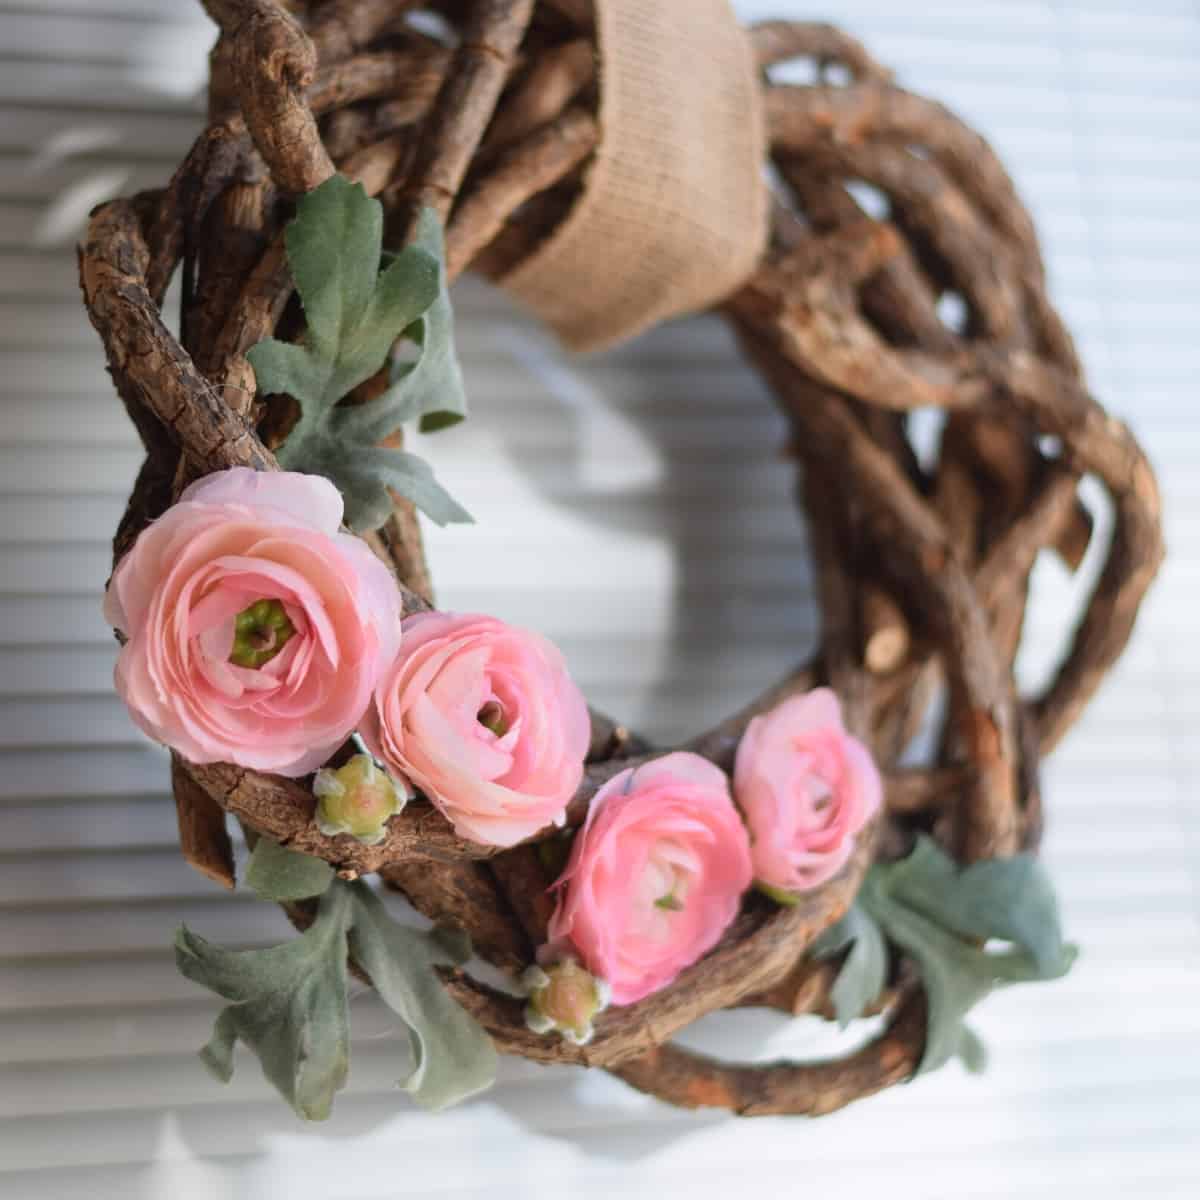
This super simple DIY Spring Wreath is easily put together in about 15 minutes. Made with a branch wreath, pink ranunculus spray, burlap ribbon, and a hot glue gun.
Easy, peasy.

DIY Spring Wreath
In this tutorial, I’ll share with you just how I put together this DIY Spring wreath in a matter of minutes.
Most rustic style wreaths can be ultra pricey. I was searching at some of my favorite retailers for some fun new decor for spring.
And wreaths for the front door can range in prices of $25-50 (or more) on average. I like budget friendly projects that I can DIY with my children.
This homemade spring wreath was only $15 and it was super simple. Plus, my young children were able to help!
Don’t worry, I handled all of the hot glue steps!
Related: DIY Embroidery Hoop Wreath
Supplies Needed for this Wreath:
I purchased these supplies at Hobby Lobby. Don’t worry if you don’t have one nearby, you can shop online! Which is what I did.
- Branch Wreath (13”) – this is priced at $9.99. But use the 40% off coupon (print online) and get it for only $5.99!
- Pink Ranunculus Spray – $6.99 … unless you are able to grab yours during the floral sale! I missed it. I also only used one and cut the flowers and some of the leaves off before placing on the wreath.
- Burlap Ribbon (2” wide) – this was priced at $3.99 and I was able to get it during the wedding sale for 50% off, so only paid $1.99.
- Wire Cutters
- Hot Glue gun & glue

How do you hang a wreath?
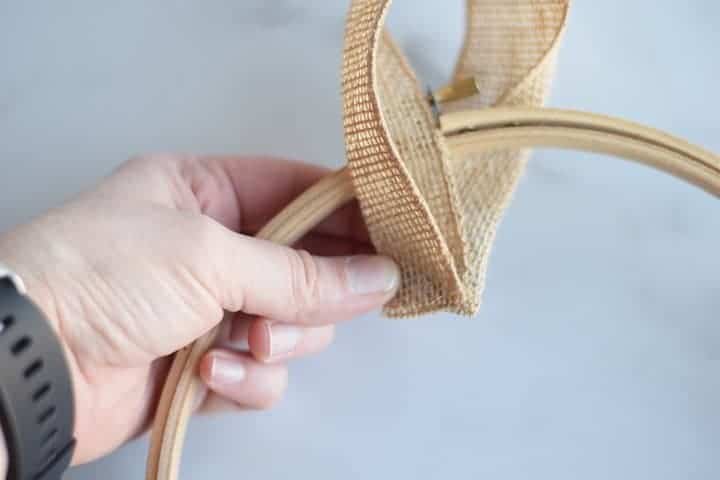
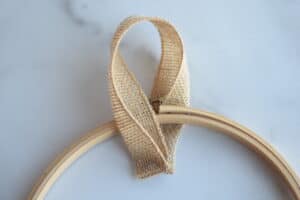
I used burlap ribbon to hang the wreath and created a simple loop. Begin by determining how long you want your ribbon to be and cut.
I then folded the ends in half and then used my hot glue gun to hold it together.
Below are images from another wreath project that I put together. But you can see how simple it is to create a loop to hang the wreath.
For this spring wreath, I used a much longer loop than is pictured below. This is for reference on how I make my loops to hang my homemade wreaths.


Spring Wreath Tutorial
I put together these simple printable instructions for you to make your own farmhouse rustic inspired wreath.
DIY Spring Wreath
Ingredients
Equipment
Method
- Begin by using the wire cutters to carefully remove the florals between the base and stem. Follow the same process for the leaves.
- Plug in the hot glue gun. While the hot glue is warming up, measure and cut the burlap ribbon to your desired length.
- Take one end of ribbon and fold in half. Use the hot glue to hold in place. Take the other end of the ribbon and wrap it around the branch wreath. Repeat the steps for the other end. This image is from another wreath that I put together, but it helps to demonstrate how I hang my burlap ribbon.

- Use the hot glue gun to hold the ribbon in place in the back.
- Next, place the ranunculus florals in desired placement. Use the leaves as fillers to areas where needed.
- When you have your desired floral placement, use the hot glue gun to tack the florals in place. Then use the hot clue to tack the leaves into the desired places.
- Allow to cool/dry completely before hanging the wreath in the desired location. (see note below)


Cool you need more stuff like this👍